In my mind, I had always viewed flash as the devil, making photos look over exposed with unnatural looking light; however, after my last Photography II Class— taken at New York City’s PhotoUno Photography School — I learned flash can actually have many benefits for the professional photographer.
Today Patricia, our Photography II instructor, will take us through a number of flash techniques that work well with certain situations, as well as help us to be able to analyze a photo and say why it is good beyond “because I like it.”
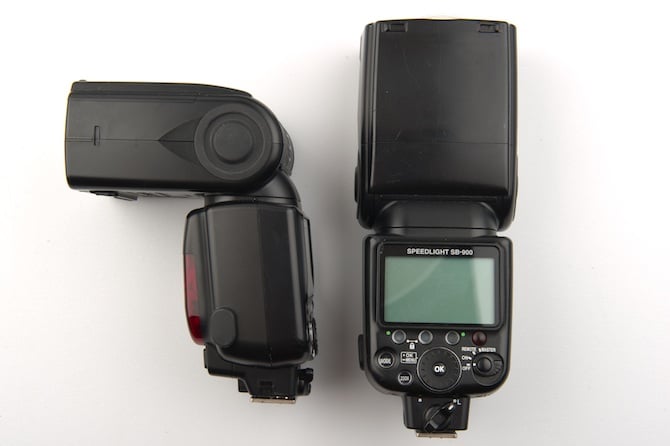
Quick note: In our last installment of Behind the Lens we discussed metering modes. Make sure to keep yours in Matrix (or it’s equivalent in your camera), as this is the metering mode your flash uses.
We first start with an important question Shakespeare himself probably wondered. “To flash or not to flash?”
While there are indeed certain situations you wouldn’t use a flash for — for example, the beach — there are others where it is useful, such as at an event where you want sharp images of specific people. This scenario is what guide the thinking of our first flash lighting technique for the class, especially useful in low light situations.
Flash Technique #1
In this technique you are using flash as the main source of light, allowing for a very low ISO, crazy fast shutter speed (you can learn your camera’s flash sync speed by popping the flash and testing how high you can make it go) and eliminating any white balance issues. Moreover, you won’t need to worry about the exposure indicator here, as the point is to reduce ambient light.
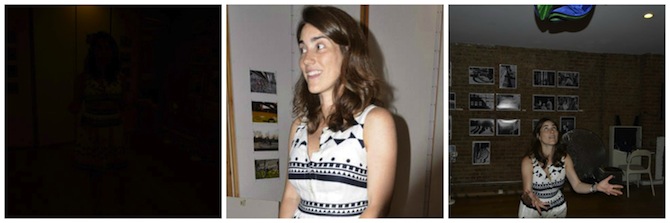
To bring this concept to life Patricia instructs us to stand up with our cameras, our ISO set to a low number like 400 and our shutter speed cranked up as high as possible with the flash popped (its sync speed). From there we choose our desired aperture and take a test shot. The goal is to get a completely dark photo, void of any ambient light. Because I still see Patricia’s white dress after the test shot I end up needing to lower my ISO to 100. Next, we set our white balance to flash mode since we would be using flash — if you don’t have flash as a white balance option you can choose sunlight, as the two are equivalent — and take the shot. If you’re zoomed in enough, you’ll notice your subject is perfectly in focus; however, if you want to get some ambient lighting and background details you can slow down your shutter speed.
Patricia also shows us the benefit of this technique for freezing images in low lighting, as it still allows for a super fast shutter speed. If not using flash, one would need to crank up the ISO and increase the shutter speed to allow more light in. It’s also great for avoiding any issues with mixed lighting, as your flash with be the sole illuminator.
Flash Technique #2
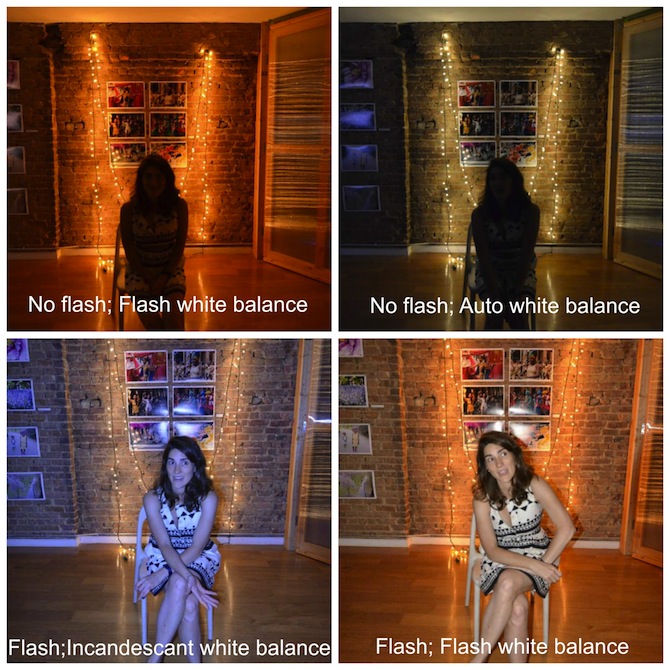
The next technique we practiced involves combining flash and ambient lighting, which allows the photographer to capture the true vibe of the room while highlighting the shadows with flash, which is useful useful in low light situations — like in the first example — but still capturing the true essence of a place.
For this technique our exposure indicator comes back into play, as we first set our cameras as if we weren’t using flash, using the elements of the scene to guide our ISO, aperture and shutter speed choices to get the indicator to 0. Then, Patricia instructs us to pop the flash, keeping in mind that the camera’s sync speed is our limit. We test out a few images, tweaking as necessary. If a person is too exposed we change the flash’s exposure compensation — check your camera manual on how to do this, but know it is possible to make your flash weaker or stronger — and if the background is overexposed to increase shutter speed and let in less light.

Dragging The Shutter
Finally, we learned what I think everyone thought was the most fun of the flash techniques, dragging the shutter.
“Dragging the shutter basically means that you are exposing for the background using slow shutter speeds like 1/8 and 1/30 and then you are using the flash to freeze a person,” explains Patricia. “It is basically making sure to get the ambient light and using the flash to freeze an action.”
This also combines ambient light and built in flash — and, according to Patricia, is also a good time at parties. With this technique you’ll also set your ISO to capture ambient light; however, you’ll want a very slow shutter speed — I used 1/8 — to capture movement. Next, set your aperture to have the exposure indicator go to neutral, and set your white balance to flash. Now, position your subject in front of some small lights, as your going to use the illuminated bulbs to create light trails in the photo.
Here’s where it gets interesting. To create motion using the lighting you’re going to exposure for your subject and zoom out while taking the photo, simultaneously. If you don’t have a zoom lens, you’ll simply whip your camera to the side, rotating it so that the top of the camera moves sideways toward your shoulder. Picture touching your ear to your shoulder while the camera is held in front of your face (only you don’t actually need to move your head).
Tada! This is just yet another example of the possibilities of flash. I would be lying if I said I wasn’t excited to try this the next time I’m out with friends.

How To Tell If A Photo Is Good
We end the class with something much less technical, but still challenging: using critical analysis to decide if a photo is good. This involves analyzing a photo’s form and content, which should lead you to an interpretation and evaluation.
To help make this concept stick, PhotoUno created a diagram that photographers can fill in to come to their answer. It begins with looking at a photo and picking out what is evident in an objective manner, answering the who/what/when/where/how/why questions. This is the content.
Next, you’ll look at the form of the photograph, first analyzing the techniques used, like fast or slow shutter speed, where they positioned the subject in relation to the light and if the photographer opted for shallow or deep depth of field.
Also part of the form is the composition. Here you’ll look at the light and shadows, the rule of thirds and the rule of odds, a concept I’d never heard of but Patricia explained dealt with the idea that an odd number of subjects in a photo is typically more interesting than an even number.
Once you’ve made notes about content and form you can try to interpret what the message is that the photographer is trying to communicate and what the story behind the photo is. Finally, it’s time to evaluate the photo. Interestingly, critically analyzing one of our own photos is part of the homework for next week’s class, an assignment I think will be a personal challenge. It’s always tough to critique yourself, especially in front of others; however, I know it will be great practice in becoming more critical and aware of how I take photos in the future.
This article is part of an original Epicure & Culture series: Behind The Lens.
Do you have a flash photography tip to add? Do you have a method for analyzing photos? Please share in the comments below.
Also Check Out:
A Guide To Shooting Sharper Images And Fine Tuning Exposure
Wanderlust-Inducing Sign On The Beach In The Bahamas
#InstaTravel: Culture, Food And Beautiful Views In Guatemala
Jessica Festa
Latest posts by Jessica Festa (see all)
- A Culturally-Immersive Adventure In Mongolia’s Altai Mountains - Jul 8, 2023
- This Recipe Sharing Platform Supports Women In The Culinary Industry (Labneh Recipe Included!) - Nov 5, 2020
- Hiking The Mohare Danda Community Eco-Trek In Nepal - Jun 3, 2020
- 6 Important Questions For Choosing A Responsible Yoga Retreat - May 18, 2020
- How To Create & Grow A Profitable Blogging Business (Ethically) - Jan 18, 2020


Dragging the shutter ! Who would have thought? I really love the last photo you shared.
@Charu: Thanks! 🙂 It’s a fun trick and I’m definitely going to be doing it at the upcoming travel writing events.