For those with a DSLR — or Digital Single Lens Reflex — in auto mode, it’s time to learn how to take the pictures YOU want, not the ones your camera wants. In partnership with PhotoUno in New York City I’m bringing you an Epicure & Culture original series — Behind The Lens — on how to not only take beautiful photographs in manual mode, but also compose your photos to tell enthralling visual stories and improve your.
“Want more travel photography? Click here to view Epicure & Culture’s travel gallery.
While I have experience shooting in manual, I wasn’t sure if I was 100% ready to take PhotoUno’s Photography II Course. At the same time, I felt overqualified for their Photography I Course. So in order to make sure I had the experience I wanted at the school, PhotoUno set me up with private one-on-one lessons to fill in any gaps and prepare me. Within two sessions, I was ready for Photography II. Not only that, but I deeply understood many of the issues I’d had in the past when shooting.
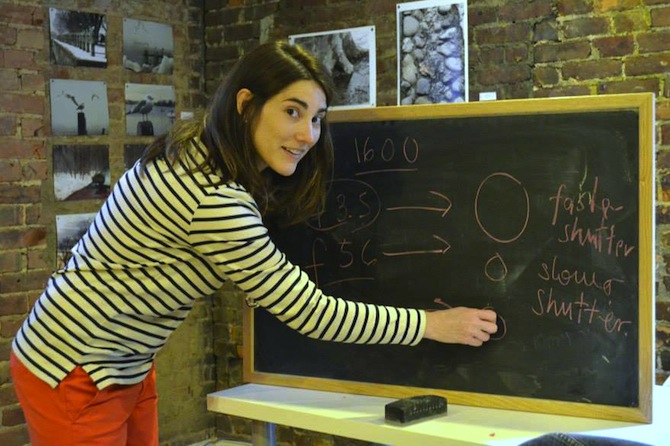
My instructor for the class was a bubbly and bright woman named Patricia, a professional event and portrait photographer. We began with her asking me questions to gauge exactly how knowledgeable I was about my camera and photography in general. Then she gave me some take-home notes and we started a PowerPoint, made interactive by exercises and examples.
The Exposure Triangle
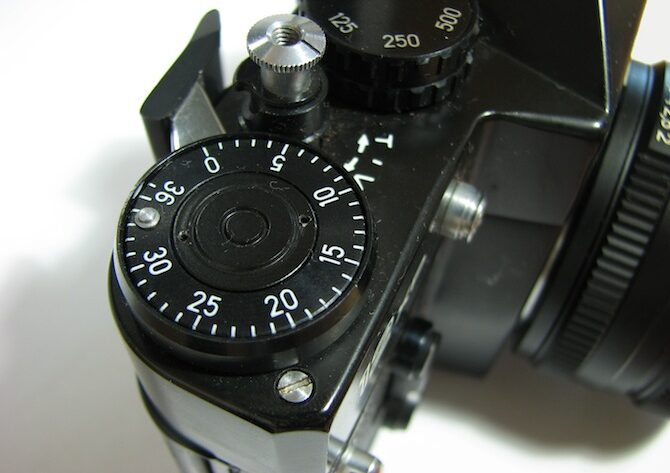
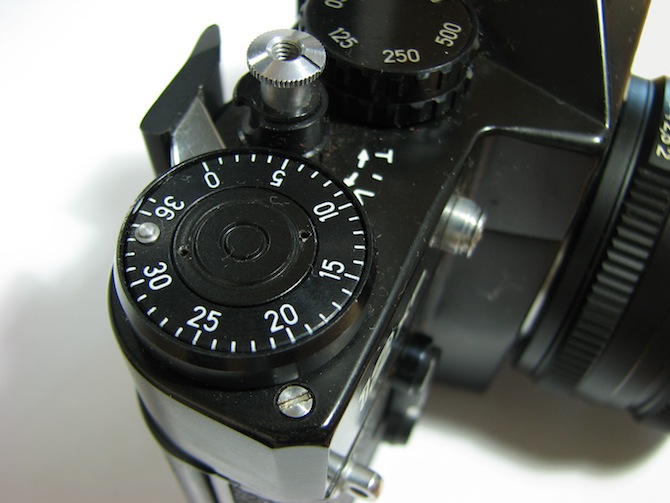
Possibly the most important concept to understand when getting to know your camera is the exposure triangle, or what affects how much light goes through your camera — the exposure. Photography is all about reflective light, which reflects off of the mirrors in your camera, hence the name SLR. To show this concept Patricia opened the back of a camera and demonstrates how quickly or slowly the shutter could be manipulated to open, explaining that the less time the curtains in front of your sensor stay open the less light that will pass through the camera, and the less exposed the photo will be.
There are three main factors — which represent the three points on the triangle — that affect exposure: ISO (light sensitivity), aperture and shutter speed.
ISO
While at one time when film cameras were still being used you would need to choose the ISO you would use for a roll beforehand, today you can switch this number whenever you feel like it through the shooting menu in your camera. According to Patricia, one rule of thumb that’s generally accurate is ISO 100-200 works for sunny days, ISO 400 works for cloudy days, ISO 800-1600 works for indoors and ISO 3200 works for nighttime. That being said, if you’re shooting night photography with a tripod and are using a long exposure like 15 or seconds, using ISO 100 allows for a clear shot without grain.
Looking at your ISO menu choices, you might notice the numbers don’t skip by 100s, but double each time. For example, when going from taking photos in a sunlit outdoor setting to cloudy you’d change your ISO from 200 to 400 instead of 200 to 300. This is because the language of photography is stops. To move a full stop you’ll need to double or cut in half the amount of light you’re letting into the camera. Anything in between is light adding a “teaspoon of light,” as Patricia put it. And if you change your ISO, shutter speed or aperture by one stop, you’re letting in half as much/less light.
When choosing your ISO — which should be the first setting you adjust when setting up your camera to take a shot — also keep in mind that the higher the ISO, the more your chance of having “noise,” or grainy photos is. I personally was surprised to learn that the ISO threshold for grainy photos isn’t universal for all cameras, even of the same brand, but often depends on how current your camera is. The newer your camera, the higher you can set your ISO before experiencing grain.
Shutter Speed
Shutter speed is another important factor in determining exposure. When looking at shutter speed the main thing you need to decide is if you want your subject to be frozen (fast shutter speed) or show movement (slower shutter speed). Keep in mind, the faster the shutter speed the less time the curtain in front of your sensor is open for light to pass through. This means the photo will be less exposed, and you should adjust your aperture accordingly.
Patricia provided a helpful rule of thumb. To prevent motion blur when setting your shutter speed: 1/60 seconds is good when you have people posing for you, 1/125 seconds usually works when you’re photographing people chatting at an event and 1/250 is a good choice for sports and shots with a lot of movement. That being said, if you’re zooming in you’re more prone to camera shake. Doubling your focal length and making it the denominator of your shutter speed — for instance, a lens zoomed in to 60 mm would be 1/120 seconds — can solve this problem.
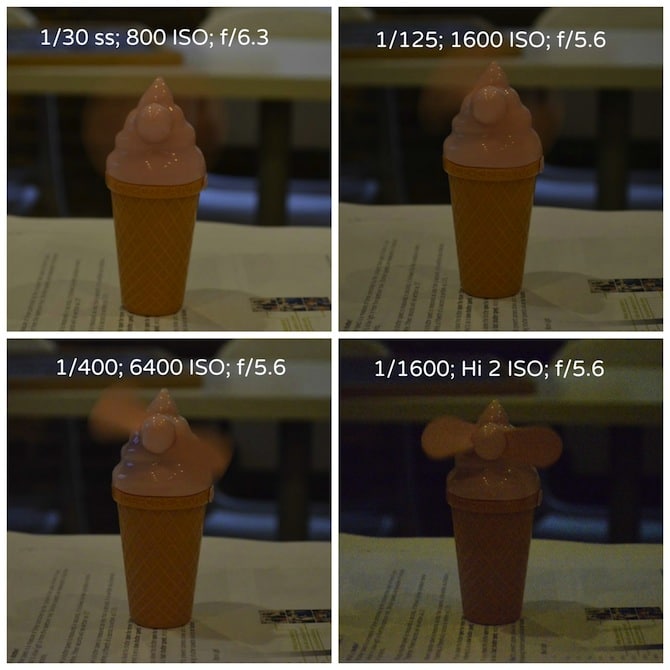
To test this, Patricia set an ice cream cone-shaped fan out front of me and flicked the “on” switch. Because we were indoors we started with ISO 800, and set the shutter speed to 1/30, adjusting the aperture as needed. From there we moved up to 1/60, 1/125, 1/200, 1/400, 1/800, 1/1600, until I couldn’t open my aperture any wider with my lenses f/5.6 aperture limitation. This happened at 1/125. At that point, it was necessary to re-adjust my ISO by making it higher to get the same — albeit grainier — effect. For me, it was interesting to see how easy it was to manipulate the photo simply by making minor adjustments.
Panning Technique
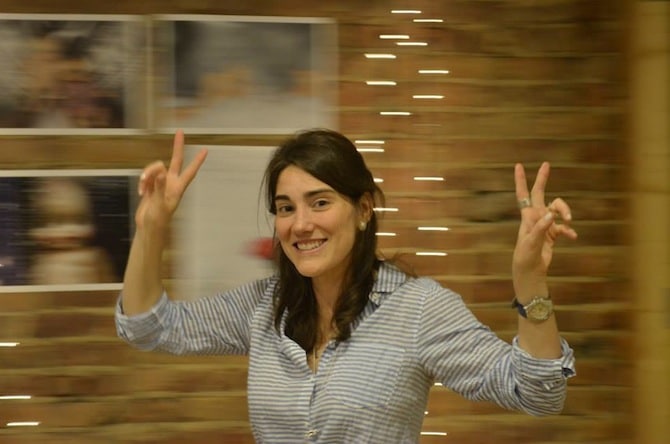
Going over motion blur led us into the next topic: panning. Panning is a photography technique allowing for dynamic shots as you follow the horizontal movement of an object with your camera to show more dramatic motion. To test this out, Patricia walked back and forth in front of a wall gowned in dangling Christmas lights, which added an even more dramatic effect, especially when they smudge horizontally for a painted effect as shown above. One important thing to point out is one should set their autofocus on continuous so you can rapidly take many shots, as 85% of the pictures you take probably won’t come out with your subject sharp.
Night Shots And Painting With Light
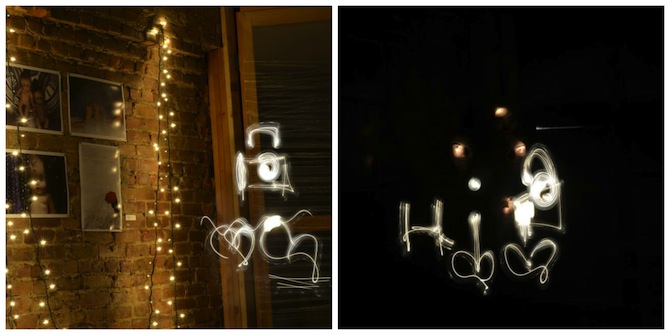
We built onto this concept by painting with light and working on night shots. Because it was daytime Patricia closed the windows and shut off the lights except for some tiny Christmas bulbs, and I locked my focus point on one of them. For this a tripod is needed — Patricia let me borrow a Gorillapod — allowing me to set the ISO to a low 100, despite the darkness. This ensured little to no noise, even with the slow shutter speed of 30 seconds. Tip: Make sure to switch your release mode from single frame to self timer so you can step back and let the camera work without disturbing it.
I was amazed when I saw the resulting image with the Christmas lights appearing like star bursts. What was also astonishing was the ability to paint with light. To do this, we kept the settings the same, with Patricia standing in place with a flashlight in her hand and the lights on. With the lights on I set the exposure by half-pressing the shutter button and starting the self timer, giving Patricia 10 seconds to turn off the lights, go back to the same exact spot she had been standing when I set the exposure (she left the flashlight there to show her where that was) and began drawing and painting using the flashlight. Remember, with long exposures the camera won’t pick up a moving person walking around in the camera’s vision unless, as you can see in the lighter of the two shots above. Patricia is actually “in” that photo; however, because she was walking around the camera couldn’t capture her.
Aperture
What I found most fascinating about the class was when Patricia dispelled the myth that lower f/stop lenses are better than higher f/stop lenses. This is something I’ve been told by many of my friends in the travel and lifestyle writing world. The truth is, many people believe lower f/stop lenses are better because the photos look more exotic — and therefore more professional to some — due to the shallow depth of field. While this works well for portraits or instances where you want a blurred background or foreground, a landscape shot where you want everything in focus would fare better with a higher f/stop or aperture number. Remember, because a wider aperture means more light is coming in the shutter speed will be faster, as opposed to a smaller opening where the shutter speed is slower in order to allow more light in.
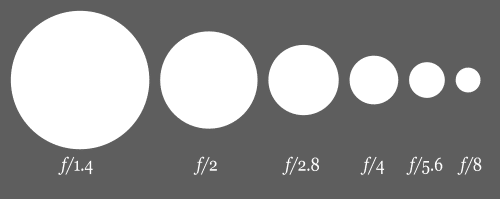
So what is aperture? To put it simply, it refers to how wide of a hole or opening in the lens you’re allowing for light to enter the camera. Keep in mind, the wider the hole the more light that gets let in. What can be confusing about this to some is that the wider the aperture, or the larger the hole, the smaller the aperture number. This concept can be better understood looking at the diagram above.
Depth of Field
Depth of field, according to PhotoUno, refers to “the extent of sharpness in your image — how much of your image is sharp in front of and behind the subject you are focused on.” Again, if you have a shallow depth of field you’ll blur the background and foreground, while a deep depth of field keeps everything in focus.
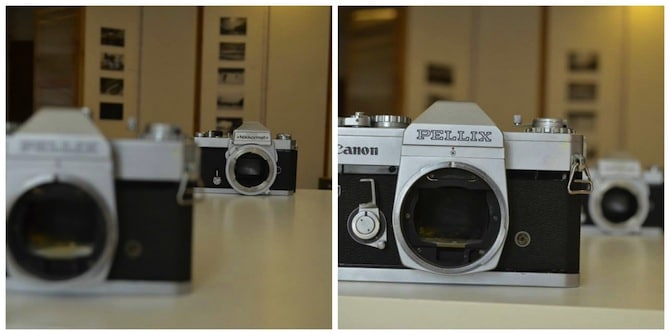
To choose what you’re going to focus on you can keep your lens on autofocus but manually focus your camera to choose a single focus point (AF-S). Keep in mind, your camera chooses this point as a plane, meaning everything horizontally in-line with that point will be in focus.
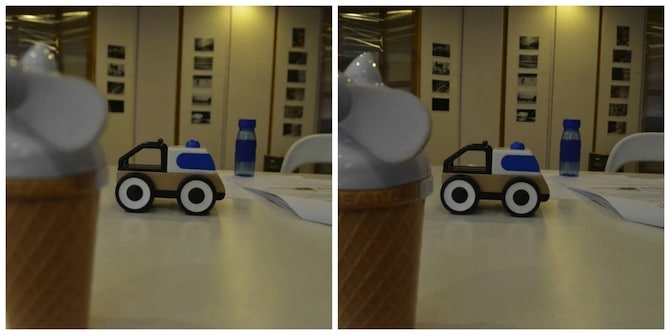
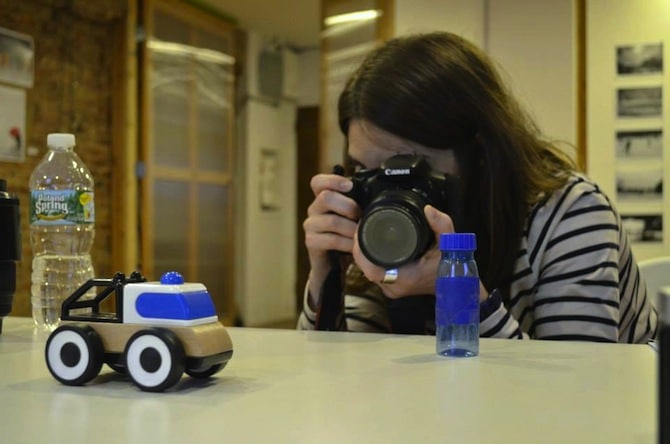
In order for me to practice this concept Patricia set up three items at different planes, an ice cream cone, a truck and a water bottle. She then instructed me to select a single focus point using the grid of dots on my camera screen.
We repeated the exercise with two camera bodies set at different planes. As you can see in each example above, shifting your focal point can dramatically affect the outcome of the photo.
There are three things that affect depth of field: aperture or f/stop (discussed above), focal length and distance from subject. Focal length refers to how much your lens is zoomed in or out. When you zoom in, your lens is getting longer, leaving less space between you and your subject. This leads to a shallow depth of field, and a blurring of the foreground and background. Camera shake is also more likely the more you zoom in, so when doing this try to use a tripod.
Also keep in mind your subject can become distorted when you zoom in too much, as Patricia showed me through an exercise where I first took a photo of her face zoomed in, and another where I simply had her move to the correct position where just her frame was in focus. In the zoomed-in version, her face looked distorted, while the other photo was much more flattering. Zooming out creates more space between yourself and your subject, and a larger depth of field.
Something else that affects depth of field is the distance you are to your subject. This is because the closer you art the less depth of field is possible. The closer you get, the less that can be seen and vice versa.
Trouble-Shooting Tricky Lighting
Have you ever been in a situation where your camera just won’t focus? You click the shutter, but all that you hear are the gears in your camera crunching and cranking. This is often because there is not enough contrast in the screen for your camera to focus or there is tricky lighting. In this situation, you’ll want to move slightly to one side until you get some contrast, half-press your shutter until the focus is locked in, then place your subject back in the frame position you want it and shoot.
This gets into focus recompose techniques. When you recompose your photo, first position your subject in a place where you can lock in the focus by half-pressing your shutter. From there, you can reposition the subject by moving the camera and having the subject be somewhere else in the frame. Just make sure to try as hard as possible not to shift planes, because, as mentioned above, when a camera focuses on a point it’s actually focusing on that point’s plane.
Another reason your camera may not be focusing is there’s not enough light. This is something I’ve experienced numerous times in dimly-lit restaurants, and luckily Patricia showed me an easy trick. First lock in the focus with your flash up by half-pressing the shutter. Then, close the flash and take the photo.
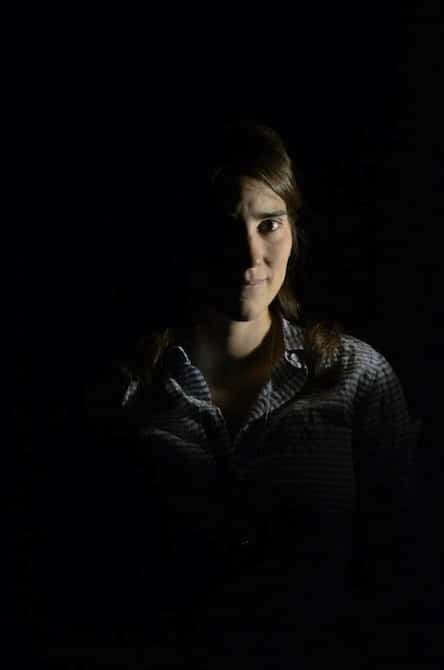
Patricia and I also worked in depth on how to capture a subject when two different lighting situations are involved. Remember, your eyes see more than your camera. For example, if your subject is sitting in a chair illuminated on one side by a concentrated light — for our exercise we used a lamp with a construction paper tube around the head — your eyes will still see what’s happening in the background; however, your camera will only see the blackness and lit up part of your subject’s face. In order for the shot to be neither over or underexposed, you need to expose for your subject. To practice this, Patricia sat in the chair illuminated on only one side of her face. I got up close to her cheek with nothing else in the frame and set my ISO to 1600, my shutter speed to 1/160 and my aperture to f/5.6. Once I’d exposed for her skin, I moved back to get the entire scene in the frame, and was able to capture the above photo.
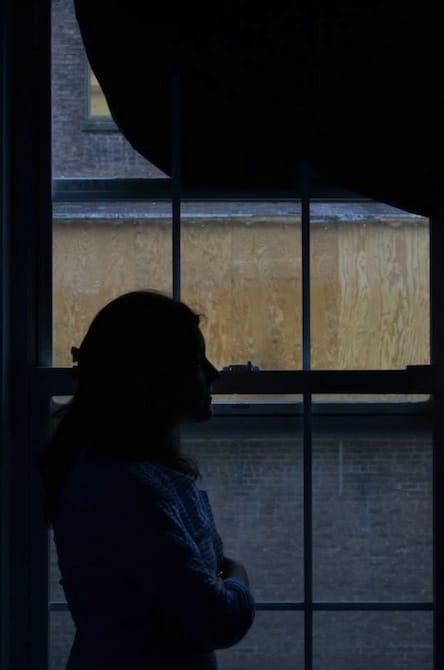
We then practiced the opposite, with Patricia standing against a window, the light flooding in behind her. For this one we made a silhouette, with me setting my exposure for what was outside — the background light source — as to underexposure my subject (Patricia) and make her look dark. While looking at your camera’s histogram may lead you to believe this is an unbalanced shot, sometimes this is okay if you’re going for an unconventional shot.
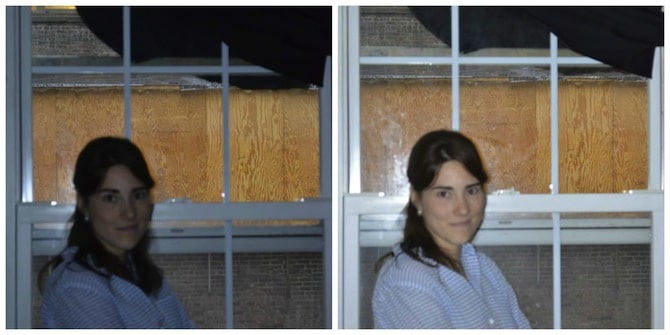
So, what if you wanted to expose for both Patricia and the window? According to her, you can’t, at least, not without the flash. Keep in mind you can take a shot and then evaluate the flash intensity — called flash exposure compensation — and make it more or less intense as needed. On my Nikon, I did this by simultaneously pressing flash, the +/- button and spinning the wheel usually used to set shutter speed and aperture.
I hope you’ve learned something new about how to use your camera. I know I sure have. Stay tuned for more articles in conjunction with PhotoUno in an Epicure & Culture original series: Behind The Lens.
You May Also Like:
Creative Travel: Exploring The World’s Best Immersive Art Hotels
Learning The Art Of Traditional Tuscan Cooking
Creative Culture: Exploring Johannesburg’s Art Scene In Eclectic Newtown
Do you have any tips to add for mastering your DSLR’s manual mode or conquering tricky lighting situations? Please share in the comments below.