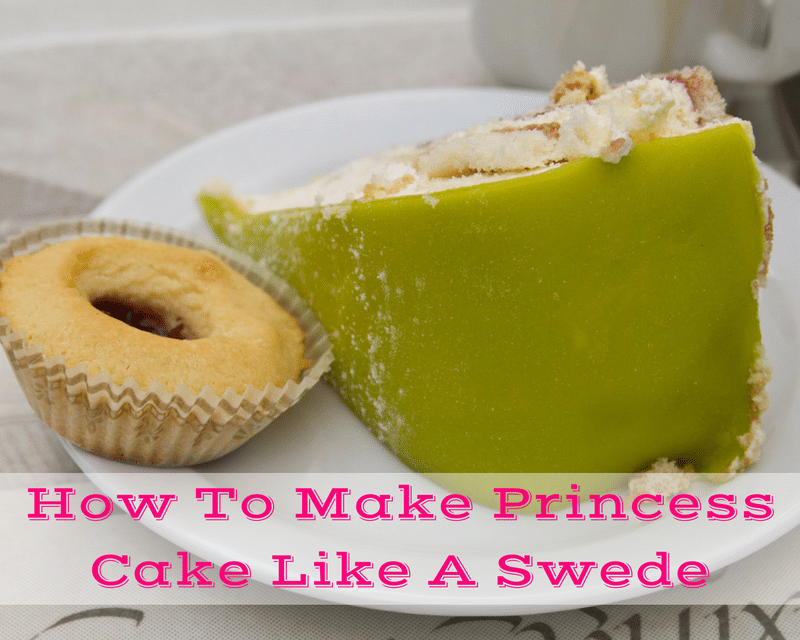
Over time Swedish cuisine has accumulated a number of decadent additions: the kanelbulle cinnamon bun, sweet or salty flavored licorice; the polkagris candy cane stick, the sticky chocolaty kladdkaka cake, and the gooey rich chokladboll; however, there is a signature treat that is considered to be a royal indulgence — with the backstory to prove it.
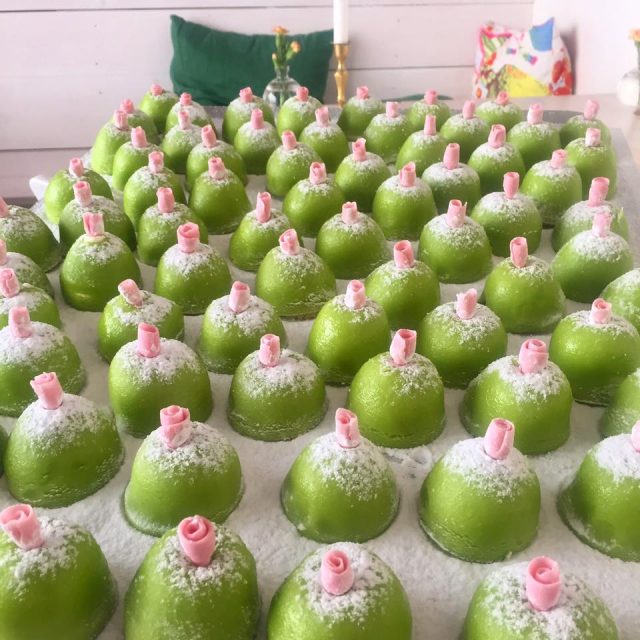
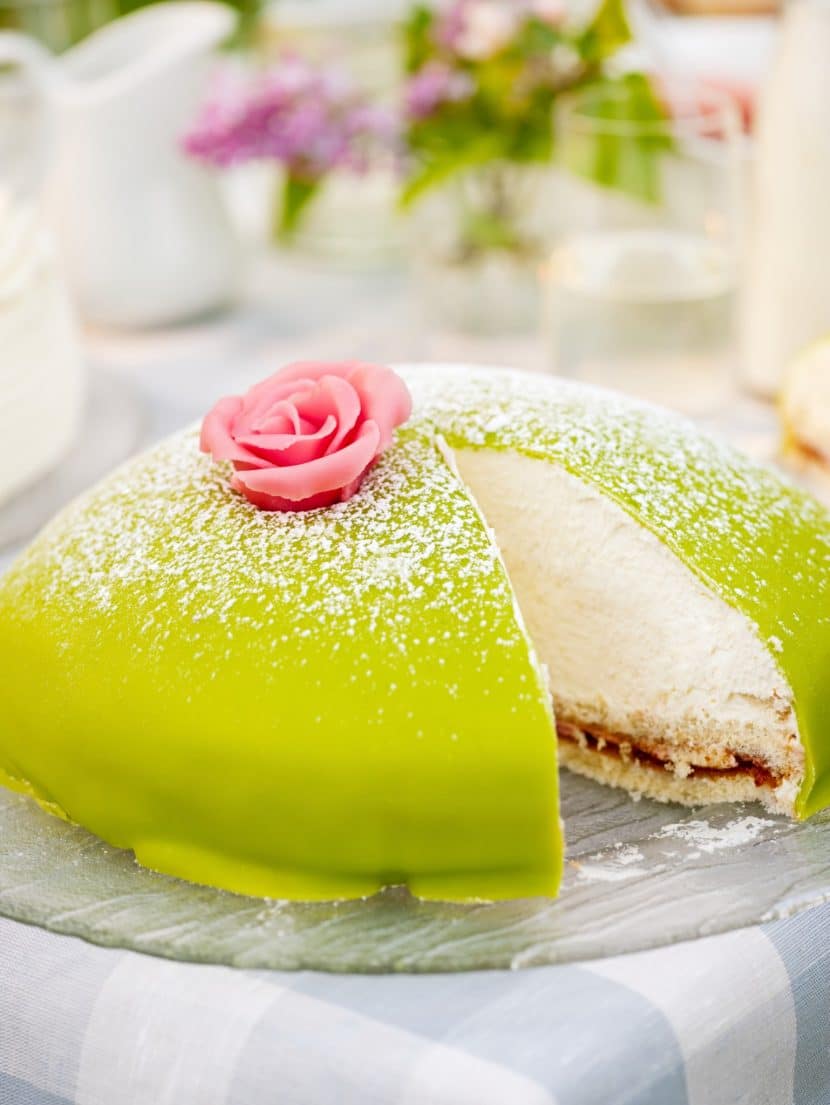
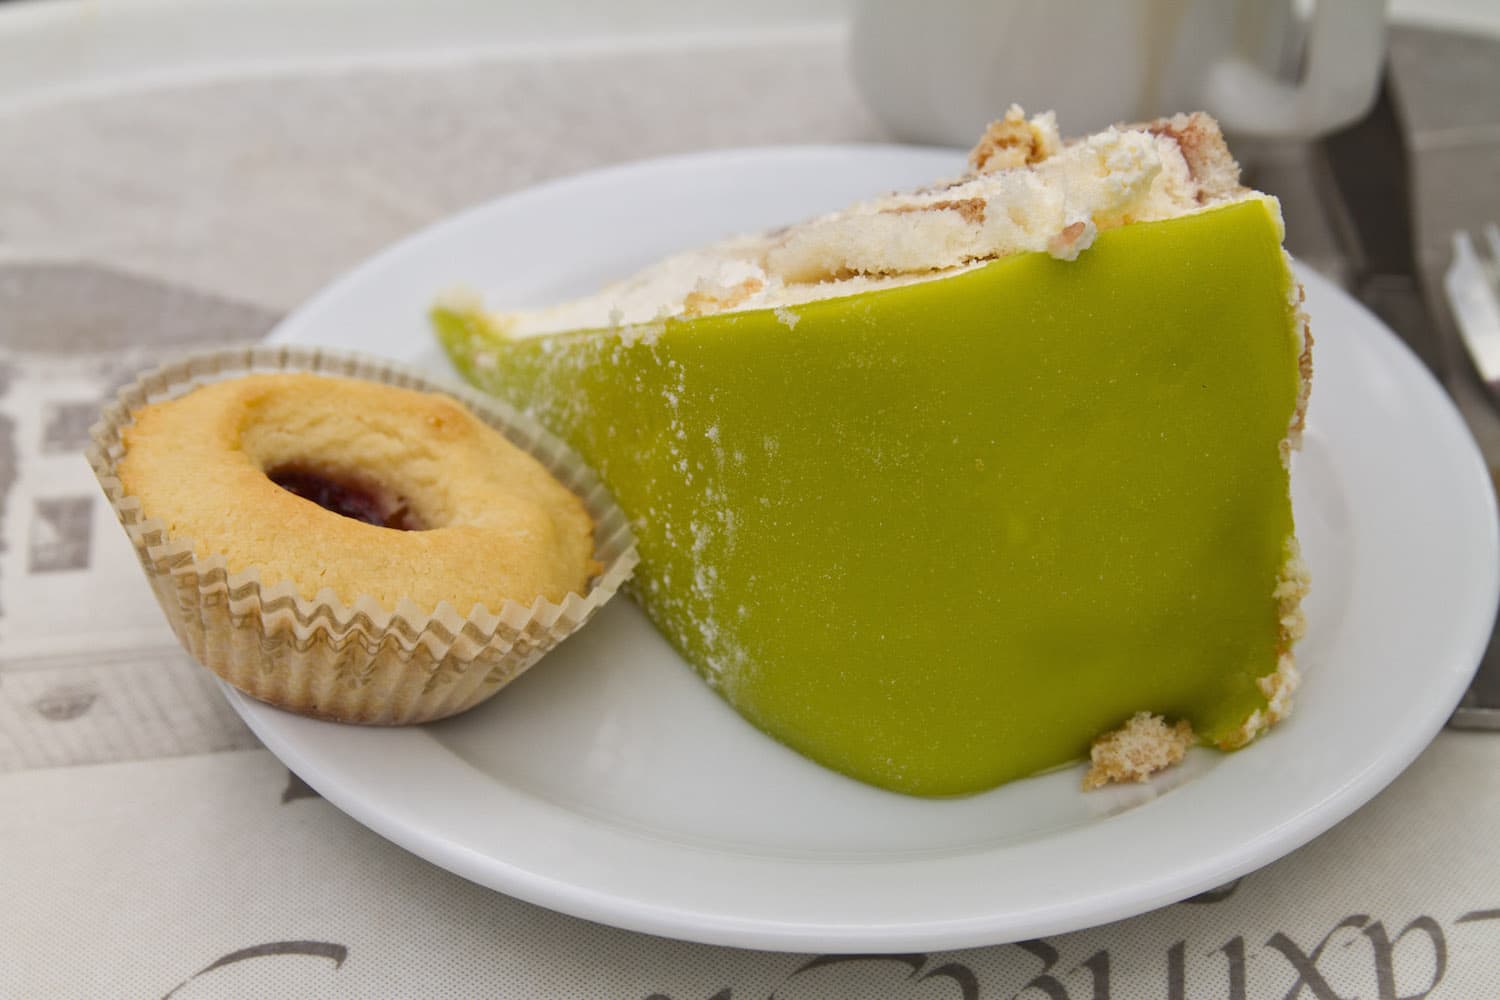
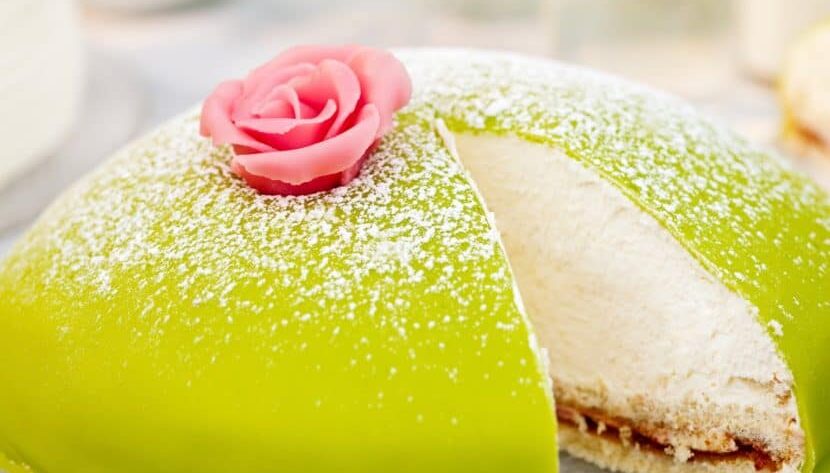
This refined dessert is called the Prinsesstårta, also known as the Princess Cake. What makes this cake so regal first involves its rich flavor and pretty presentation. Here’s the setup. About eight or nine layers of yellow sponge cake are lined with raspberry jam and vanilla custard, then together topped off with whipped cream. Yet what truly gives the Princess Cake its dignified appearance is marzipan. Rolled thin and placed on perfectly neat as a covering, the marzipan addition usually comes in a green hue, either incredibly bright or a subtle shade. Powered sugar is dusted on top of this sweet masterpiece, with a pink candy rose as a garnish.
There are also bakers who give the marzipan atop the Princess Cake a color twist with blue (making the cake become a Prinstårta, or Prince Cake) and red or pink for a version called Pperatårta (or Opera Cake).
#Swedish Princess Cake not only has a rich taste, but a rich #history, too! #foodfacts Click To Tweet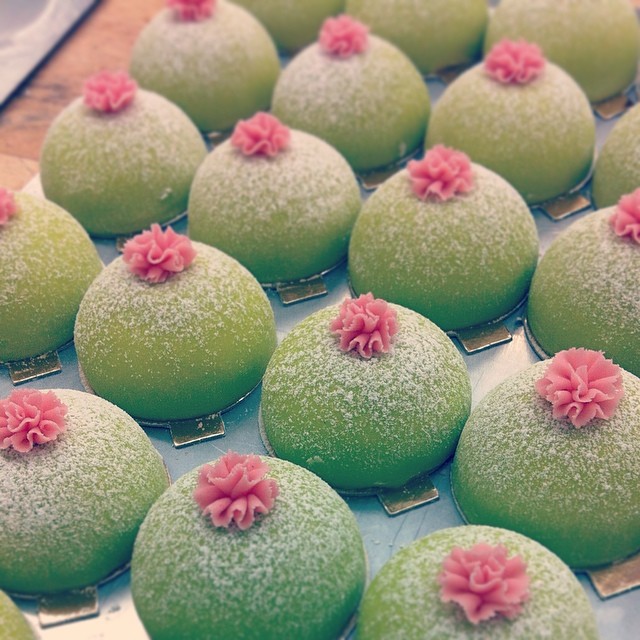
The Origins Of Princess Cake
So how did this pretty torte come about? According to SwedishFood.com, the recipe for Princess Cake is attributed to a Swedish woman named Jenny Åkerström, a home economics teacher. At the beginning of the 20th century, Åkerström taught at an all-girls school in Stockholm, and her students included three Swedish princesses, Margaretha, Märtha and Astrid. They were the daughters of Price Carl Bernadotte, and the nieces of then King Gustav V.
Yet Åkerström is known for more than instructing these princesses in formal domestic training. She was also a food writer. Around 1929 Åkerström authored a cookbook, titled Prinsessornas Kokbok: Husmanskost och Helgdagsmat (The Princesses Cookbook: Home Cooking and Holiday Food). Its first edition featured portraits of Margaretha, Märtha and Astrid on the cover, with Åkerström dedicating her cookbook to them as well. Apparently, the recipe for Princess Cake first appeared in a 1948 release of the cookbook, but actually was referred to as Grön Tårta or “green cake.” It’s assumed the name change was due to the Swedish princesses’ fondness for the cake.
Princess Cake In Modern Times
The popularity of the Princess Cake in Sweden continues today through festivals, commemorative royal births and even a Princess Cake Week in September. Yet ordering one doesn’t require a title or a seat at court – as it’s easily found in various bakeries and cafes throughout Sweden. So on your trip to Sweden, head to a cafe and order this royal confection.
Where To Get Princess Cake In Sweden
Vete-Katten, Kungsgatan 55, 111 22, in Norrmalm
A 1920s-style cafe for self-serve lunches and pastries, snacks, coffee and afternoon tea.
Cafe Schweizer, Västerlånggatan 9, 11 29, in Gamla Stan
Located near the Royal Palace, this long-time Old Town cafe offers a “cute” version of this classic cake.
Haga Tårtcompani & Bageri, Torsgatan 75 113 37, in Vasastan
Allegedly this bakery completed a cake order for Lady Gaga, plus makes gluten-free and lactose-free cake varieties, and its Princess Cake also gets the nod.
Princess Cake Recipe
Even if you can’t visit Sweden, you can make their famous Princess Cake at home using the following recipe from SwedishFood.com.
Summary
Serves 12
Preparation: 1+ hour*
Cooking: 1 hour
Total: 2-3 hours*
*Plus cooling time
Tips
• The marzipan covering should be added no more than a couple of hours before serving, but the rest of the cake can be prepared a day in advance if preferred.
• Use a good quality raspberry jam/compote for the filling. For our recipe click here.
• Don’t be frightened of making a marzipan rose: it looks very difficult but is actually surprisingly easy.
• In Sweden it is normal to use potato flour (starch) in a fatless sponge as it makes it light and airy. You can buy potato flour (starch) at health food shops or online, but if you can’t find any you can use plain or cake flour instead.
There are further tips shown in italicized bullet lists at the start of each section of the recipe below.
Impress your #culture carnivore friends by baking a #Swedish Princess Cake at home! #recipes Click To TweetIngredients
Vanilla custard
| 300 ml | (1¼ cups) | whole milk |
| 1 | vanilla pod, split lengthways | |
| 60 g | (4 tbsp) | caster (superfine) sugar |
| 3 | large egg yolks | |
| 20 g | (2 tbsp) | cornflour (corn starch) |
| 25 g | (1½ tbsp) | unsalted butter |
Sponge cake
| butter or margarine, for greasing | ||
| dried breadcrumbs | ||
| 35 g | (2½ tbsp) | unsalted butter, optional |
| 55 g | (7 tbsp) | plain flour (cake flour) |
| 55 g | (7 tbsp) | potato flour (potato starch) |
| ¾ tsp | baking powder | |
| 4 | eggs | |
| 110 g | (½ cup) | caster (superfine) sugar |
Other
| 200 g | (1 cup) | raspberry jam |
| 450 ml | (2 cups) | whipping cream |
| 500 g | (1 lb 2 oz) | white marzipan |
| green food colouring | ||
| red or pink food colouring | ||
| 30 g | (1 oz) | dark chocolate, optional |
| icing sugar (powder sugar) |
Method
Vanilla custard
• For a nice creamy color, use really fresh eggs from a good supplier.
• Take care when heating the custard in step 3 because it will curdle if overheated.
1. Heat the milk, the split vanilla pod and 30 g (2 tbsp) of the sugar over a low heat until just simmering. Remove from the heat and leave to infuse for 10 minutes.
2. In a large bowl, whisk the eggs yolks, the remaining 30 g (2 tbsp) of sugar, cornflour (corn starch) and a tablespoon of the vanilla milk mixture, until pale and creamy.
3. Stir the warm milk slowly into the egg mixture. Pour the mixture back into the pan and cook over a low heat for 4-5 minutes, until the mixture thickens.
4. Remove from the heat and stir in the butter until melted and incorporated. Sieve the mixture into a bowl, discarding the vanilla pods, cover the surface with clingfilm (plastic wrap), leave to cool and then transfer to a fridge to cool completely.
Sponge
• Traditionally Swedes grease the inside of baking tins (pans) with butter and then sprinkle over some fine dried breadcrumbs, but you can use flour instead of breadcrumbs if you prefer.
• Originally melted butter was not added to the mixture, but sometimes it is added now as the sponge keeps a bit better.
• The mixture must be whisked for 7-10 minutes using an electric whisk on a medium speed. This enables the egg yolks to stabilize the mixture, so it does not collapse when the flour is folded into it.
• It is important to use the electric whisk on a medium speed. If you use the top speed too much air will be whisked into the mixture, which it will not be strong enough to support, so it will collapse in the oven or when it cools.
• Keep a careful eye on the cake when it is nearly cooked. It is ready when the mixture just starts to pull away from the side of the tin, but it can be easily overcooked and then the top of the cake will shrink and the sides will not be straight.
• Do not open the door of the oven to check on the cake’s progress as the draught may cause the cake to cook unevenly, so you may end up with a lopsided cake.
• Make sure you cool the cake the right way up. If you flip it over when you take it out of the tin it is likely to stick to the cooling rack.
1. Pre-heat the oven to 175°C (350°F, Gas 4, Fan 160°C). Grease a deep 20 cm (8”) diameter springform cake tin (pan) and sprinkle with breadcrumbs (or flour).
2. Optional: melt the butter over a low heat.
3. Sift the flours and baking powder into a small bowl and mix thoroughly.
4. In a separate large bowl, whisk the eggs and sugar together for 7-10 minutes, using an electric whisk on medium speed, until the whisk leaves a thick trail on the surface when lifted.
5. Carefully fold the sifted flours and baking powder into the mixture.
6. Fold in the melted butter, if using.
7. Pour the mixture into the cake tin and bake for about 30 minutes, until the sponge has just started to shrink away from the side of the tin.
8. Remove the cake from the oven, leave to cool in the tin for 5 minutes and then transfer to a wire rack to cool completely.
Assembling
• The custard is initially made quite thick so that it can form a barrier to stop the jam coloring the marzipan and spoiling the appearance of the cake.
• The custard is then loosened with whipped cream to make it easier to spread; however, don’t thin it too much as you want a nice contrast with the whipped cream.
• Be sure to smoother the sides with enough whipped cream to stop the cake showing through the marzipan.
1. Cut the cake horizontally into three layers and place one on a serving plate.
2. Use 3 tablespoons of the vanilla custard to roughly pipe a ring of custard, about 3 mm (¼”) thick, around the first layer and fill the middle with jam. Place the second sponge layer on top of it.
3. Whip the cream until it forms firm peaks. Use a fork to mix 4-5 tablespoons of the whipped cream into the remaining custard to loosen it slightly. Spread the loosened custard over the second layer of sponge.
4. Pile about three quarters of the remaining whipped cream on top of the vanilla custard and smooth it into a dome shape.
5. Add the third layer of sponge, cut side on top, bending it to the shape you want. Cover the sides and top of the cake with a thin layer of the remaining whipped cream. Set aside in a fridge for an hour or overnight if preferred.
Marzipan Cover
• I have suggested using a large amount of marzipan partly because it is usually sold in 500 gram packets, but also because it is quite hard to roll out marzipan into a large circle. This means that there will be a lot of marzipan leftover, which I suggest you use to make some marzipan fruits or some punschrullar (arrack rolls).
• Getting a nice pale shade of green is tricky, so only add a small amount of coloring initially and mix it in thoroughly before adding any more.
• If using a tube of gel food coloring, knead the tube before using to ensure the dye is evenly mixed.
1. Add a tiny amount of some green coloring to 450 g (1 lb) of the marzipan, reserving the rest of the marzipan to make a rose. Knead the marzipan until you have an even pale green color. If necessary, add some more coloring, but take care when doing so to avoid ending up with a deep green color.
2. Sprinkle some icing sugar on to your work surface and dust your rolling pin with icing sugar. Roll out the green marzipan to create a circle at least 35 cm (14″) in diameter. Keep turning the marzipan over and re-dusting the work surface with icing sugar to avoid it sticking. Save the offcuts to make some rose leaves.
3. Lift the marzipan over the cake using your hands, shape the marzipan around the sides of the cake to create a smooth finish without any folds. Trim any excess to leave just a small overhang.
4. Use the leftover green marzipan to create 2 or 3 medium sized rose leaves.
Marzipan Rose
• Again you should not need all the marzipan! I have suggested coloring 50 g (2 oz) partly because it is easier to color a larger amount of marzipan, but also to allow some extra marzipan for practicing with if you want.
• As with the green marzipan, you can use any leftover marzipan to make some marzipan fruits, pink punschrullar (arrack rolls) or extra roses.
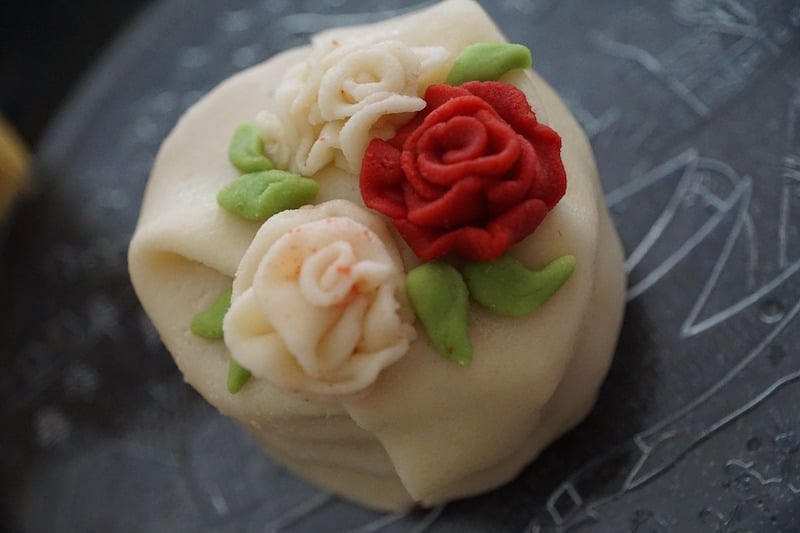
1. Add a tiny amount of red or pink coloring to the remaining white marzipan. Knead until you have an even pale pink color.
2. Cut off 15 g (½ oz) of pink marzipan and roll it out into a 12 cm (3″) sausage. Cut this into 12 pieces.
3. Using your fingers, press each piece into the shape of a thin petal. This is easier to do if you lightly dust your fingers in icing sugar periodically, as this helps to prevent the marzipan sticking to your fingers. Also, don’t worry too much about the shape of each petal, but try to get the top edge a bit thinner than the bottom edge.
4. Roll the first petal up to form a bud and wrap the remaining petals around the bud to make a rose. Bend and curl the edges of the outer petals outwards to make the rose look more realistic.
Final Decoration
• Note that the photos below were taken in artificial light, which makes the cake look too yellow.
• If you have never done any chocolate icing before, put some of the rolled-out leftover green marzipan onto an upturned glass bowl and use it to practice on.
• Use an icing bag with a No.2 Writer nozzle instead of a paper piping bag if you prefer.
1. Optional step: gently melt the chocolate in a microwave or in a bowl over simmering water. Leave to cool for about half an hour until it is quite thick. Spoon the melted chocolate into a small paper piping bag. Snip the end off and pipe swirls round the edge of the cake.
2. Lightly dust the top of the cake with icing sugar (powder sugar).
3. Cut a slit in the top of the cake with small palette knife and insert the leaves and the rose. (Originally this was done in the centre of the cake, but I think it looks better positioned off-center.)
4. Lightly dust the top of the cake again with icing sugar (powder sugar).
Have you tried or baked Sweden’s iconic Princess Cake? Please share your experience in the comments below!
Recommended:
Swedish Brown Bread: How To Savor This Delicious Tradition [Recipe]
Traditional Swedish Cooking [Great Reads]
Old Fashioned Carry-On Cocktail Kit [Travel Fun]
Latest posts by Michele Herrmann (see all)
- 15 Unique Gifts That Give Back To Charity - Jan 21, 2024
- Foodie Fun: 12 Delicious Made In America Gift Ideas - Nov 17, 2019
- How Deidre Mathis Made Her Dream Of Starting A Hostel Business A Reality - Jan 31, 2019
- Where To See NYC’s Best Street Dancing (While Giving Back) - Oct 4, 2017
- 6 Creative & Curative Tea Shops In Portland, Oregon - Aug 28, 2017





Trying this today, very excited!! Thank you for the US equivalents!!!!!!!!